Draw a Circle Photoshop 2019
In this tutorial, yous will learn how to blazon text in a circumvolve in Photoshop.
These examples will teach you how you tin type text in a circular path. It may seem simple, only they're a few tools and techniques that yous must know to work efficiently in Photoshop.
Table of contents
- Tutorial Image
- Document Explanation
- Add together Guides to Your Document
- Create an Elliptical Path
- Blazon on a Round Path
- How Not to Rotate Text on a circumvolve
- Use the Control Points to Align, and Rotate the Text Around a Circumvolve
- Type on The Lesser Half of The Circle
- Invert the Text on The Circle
- Adjust the Baseline Shift
- Type on a Path
Tutorial Image
292-Type-in-a-circle-Starter.zip (3478 downloads)
Document Explanation
On the workspace is a certificate with a Background layer and a circular pattern element. You can also work with the same files if you want to follow this tutorial footstep-by-step.
Add Guides to Your Document
Choose View > New Guide Layout.
On the New Guide Layout window, set the Columns and Rows' Number value to 2 and press OK. That will help you visualize the heart of the document and align the text.

For earlier versions of Photoshop, y'all tin can also use the Ruler by pressing Ctrl R (Windows) or Command R (macOS) and enable the Snap characteristic past choosing View > Snap.

Then, click-and-drag a vertical and horizontal ruler and bring information technology to the center until information technology snaps in place.
To double-check and make sure that your rulers are in the right place, right-click on the Ruler and select Percent.

Both vertical and horizontal guides should be at l%.

Create an Elliptical Path
click on the Ruler and select Percent.

On the Options bar, click on the drop-down menu and set to Path.

Hover the mouse right on the center where the guides meet and agree Alt (Windows) or Option (macOS) as you click-and-drag to create a circle with the Ellipse tool.
Hold the Shift cardinal to constraint the path into a perfect circle. Then, release the mouse button to complete the path.
Type on a Circular Path
On the Toolbar, select the Text tool.
On the Options bar, On the Options bar, click on the drop-downwardly carte du jour and gear up to Path.

With your Text tool, hover information technology above the path until y'all see a curved line appear on the cursor and click to kickoff typing your text.

From there, you lot should exist able to type along the circular path and apply the changes past pressing the Enter (Windows) or Return (macOS) central.
How NOT to Rotate Text on a circle
Transform the Text layer by pressing Ctrl T (Windows) or Command T (macOS) and move the Reference Point to the center of the horizontal and vertical guides.
Then, rotate the Text layer.

All the same, this may non exist the most efficient way of rotating your texts as this can obstruct the way a Character Style is applied if your plan on integrating information technology into your piece of work. Click here to acquire more about why you shouldn't calibration your texts.
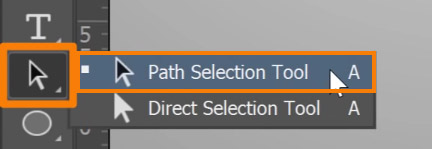
Use the Command Points to Align, and Rotate the Text Around a Circle
On the Toolbar, select the Path Selection tool and hover over your text until you lot see the cursor switches to a Text cursor with a right-pointing blackness arrow.


And so, you can click anywhere on the path to prepare your new starting point.
You can also click-and-drag to encounter the text adjust along as you move around the path and set the starting point. By clicking-and-dragging on the opposite end is also a way for you to ready the endpoint of your text.
If you wish to have the text above the horizontal guide, fix the starting point by clicking on the heart-left horizontal guide to prepare information technology as your starting bespeak.


Then, set the starting point by clicking on the center-left horizontal guide to prepare it as your starting point.

If your text is likewise long or too large, the text may be cut off. And so, reduce the font size to fit everything betwixt the starting and endpoints.
Type on The Bottom Half of The Circle
Duplicate the original Text layer by pressing Ctrl J (Windows) or Command J (macOS).
Then, click on the Middle icon to hide the original Text layer.
On the Toolbar, select the Path Selection tool.
Click-and-drag the starting point to the opposite side of the circle.


Then, click-and-drag the endpoint to the reverse left side.


The contempo steps may place your text upside downwardly simply flip information technology by clicking on either of the commencement or the endpoint and dragging it inward.


Invert the Text on The Circumvolve
Create a copy of the layer and disable the original text layer.
With the duplicate layer, select the Path Selection tool then click-and-drag your starting point towards the centre-right horizontal guide and click-and-drag the endpoint towards the centre-left horizontal guide.

Your text will announced upside down, but you can flip it by clicking the starting or the endpoint and dragging information technology inward.
Conform the Baseline Shift
Enable the original Text layer.
And so, double-click on the bottom text to highlight it and open up the Character panel by choosing Windows > Graphic symbol.

Go to the Baseline input box and match the baseline of the Text layer above past pressing the upwards or downwardly arrow key on your keyboard to conform it.


Type on a Path
Create a path of whatsoever shape with the Curvature Pen tool.

Then, select the Horizontal Type tool and click on the path.
Always scout out for the endpoint icon and place it at the end of the path so it doesn't cut the rest of your text.
To fix the text above or below the baseline, go back to the Character panel, and accommodate the Baseline value.

Set it at default by setting the value as 0 and printing the Enter (Windows) or Return (macOS) key to utilize the change.
If the curved path causes the messages in your text to exist too close to each other, simply select the space in between the letters and concord Alt (Windows) or Choice (macOS) as yous press the left or right arrow keys to adjust the kerning.
Source: https://photoshoptrainingchannel.com/type-text-circle-photoshop/
Publicar un comentario for "Draw a Circle Photoshop 2019"